

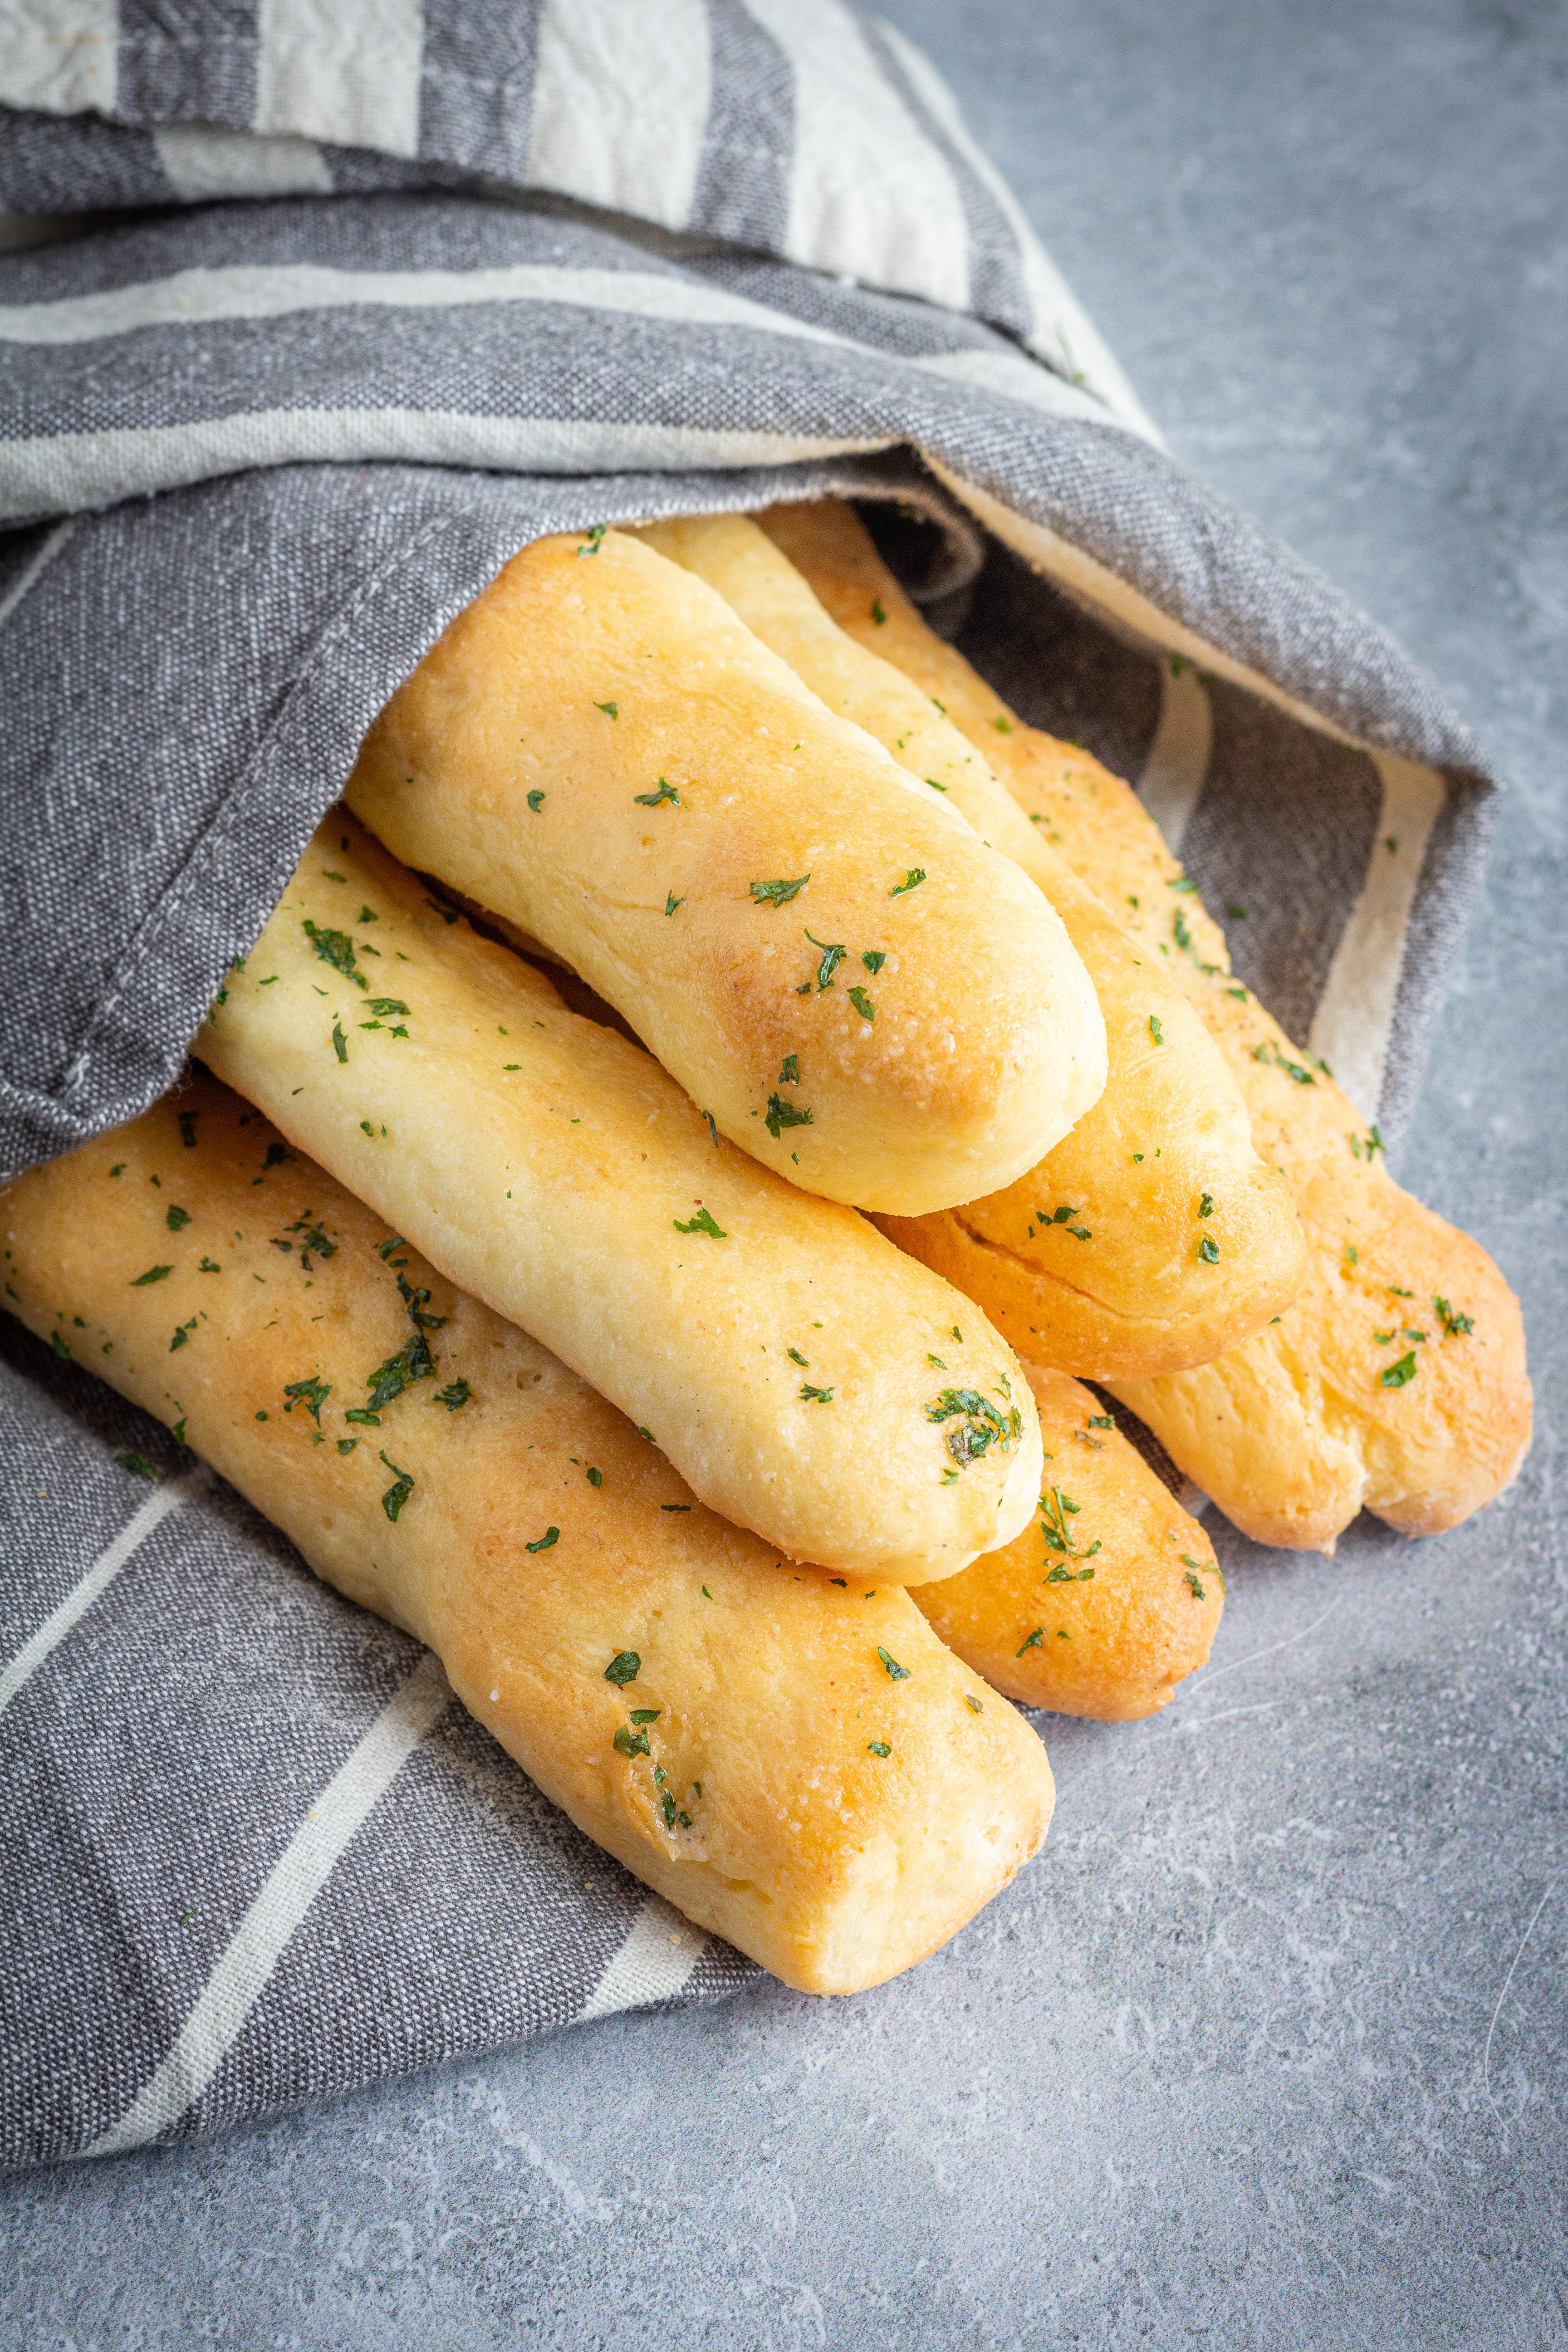
Gluten Free Soft Breadsticks
Olive Garden copycat recipe

These gluten free breadsticks are soft, pillowy, garlicky. They don’t taste “gluten free” at all so my whole family enjoys them, and we all agree they taste a lot like Olive Garden’s bottomless breadsticks (are they still bottomless? Someone tell me)
If this is your first foray into gluten-free yeast dough baking, KEEP READING! I promise it is much easier than you think.
In fact, gluten-free bread baking is quicker and less complicated than its wheat counterpart. And we love that.
Gluten Free Breads are Easier Than Gluten Breads
Here’s why gluten-free breads are easier than gluten breads:
There’s no gluten to develop, which means no kneading. You’ll notice most of my recipes feature a dump-and-go mentality: dump all the ingredients into a bowl and mix until smooth. SO easy.
Skip the first rise, you just need to mix, shape, and rise once before baking.
That being said, shaping the sticky dough can be a bit tricky, so here are my tips
Did you know I wrote a whole book about How to Make Gluten Free Bread That Actually Tastes Good? You can grab a copy on Amazon or download the full e-book today (for half the price)
How to Shape Gluten Free Yeast Dough:
Because gluten-free flours absorb moisture as they rise and bake, you’ll want to start with a very sticky dough.
If the dough isn’t wet enough, you’ll end up with a tough, dense, product (maybe this has happened to you?
Here are a few tips for shaping the wet and sticky gluten free dough you’ll need to make light and fluffy baked goods:
Use the flour method. This is what you’ll be doing in this recipe. You’re going to gently coat just the outside of your dough as you work with it, to retain the moisture inside and prevent sticking as you form it into breadsticks. It’s important that you don’t work additional flour into the dough.
Gloves can help. The dough is less likely to stick to food-save gloves than your fingers, so wearing a pair can help.
Liquid is your friend. For my gluten free cloverleaf rolls, I utilize flavored, melted butter to help form the little balls of dough. You can also dip your finger tips in water as you pinch ends or roll out breadsticks if you don’t want to add any extra flour.
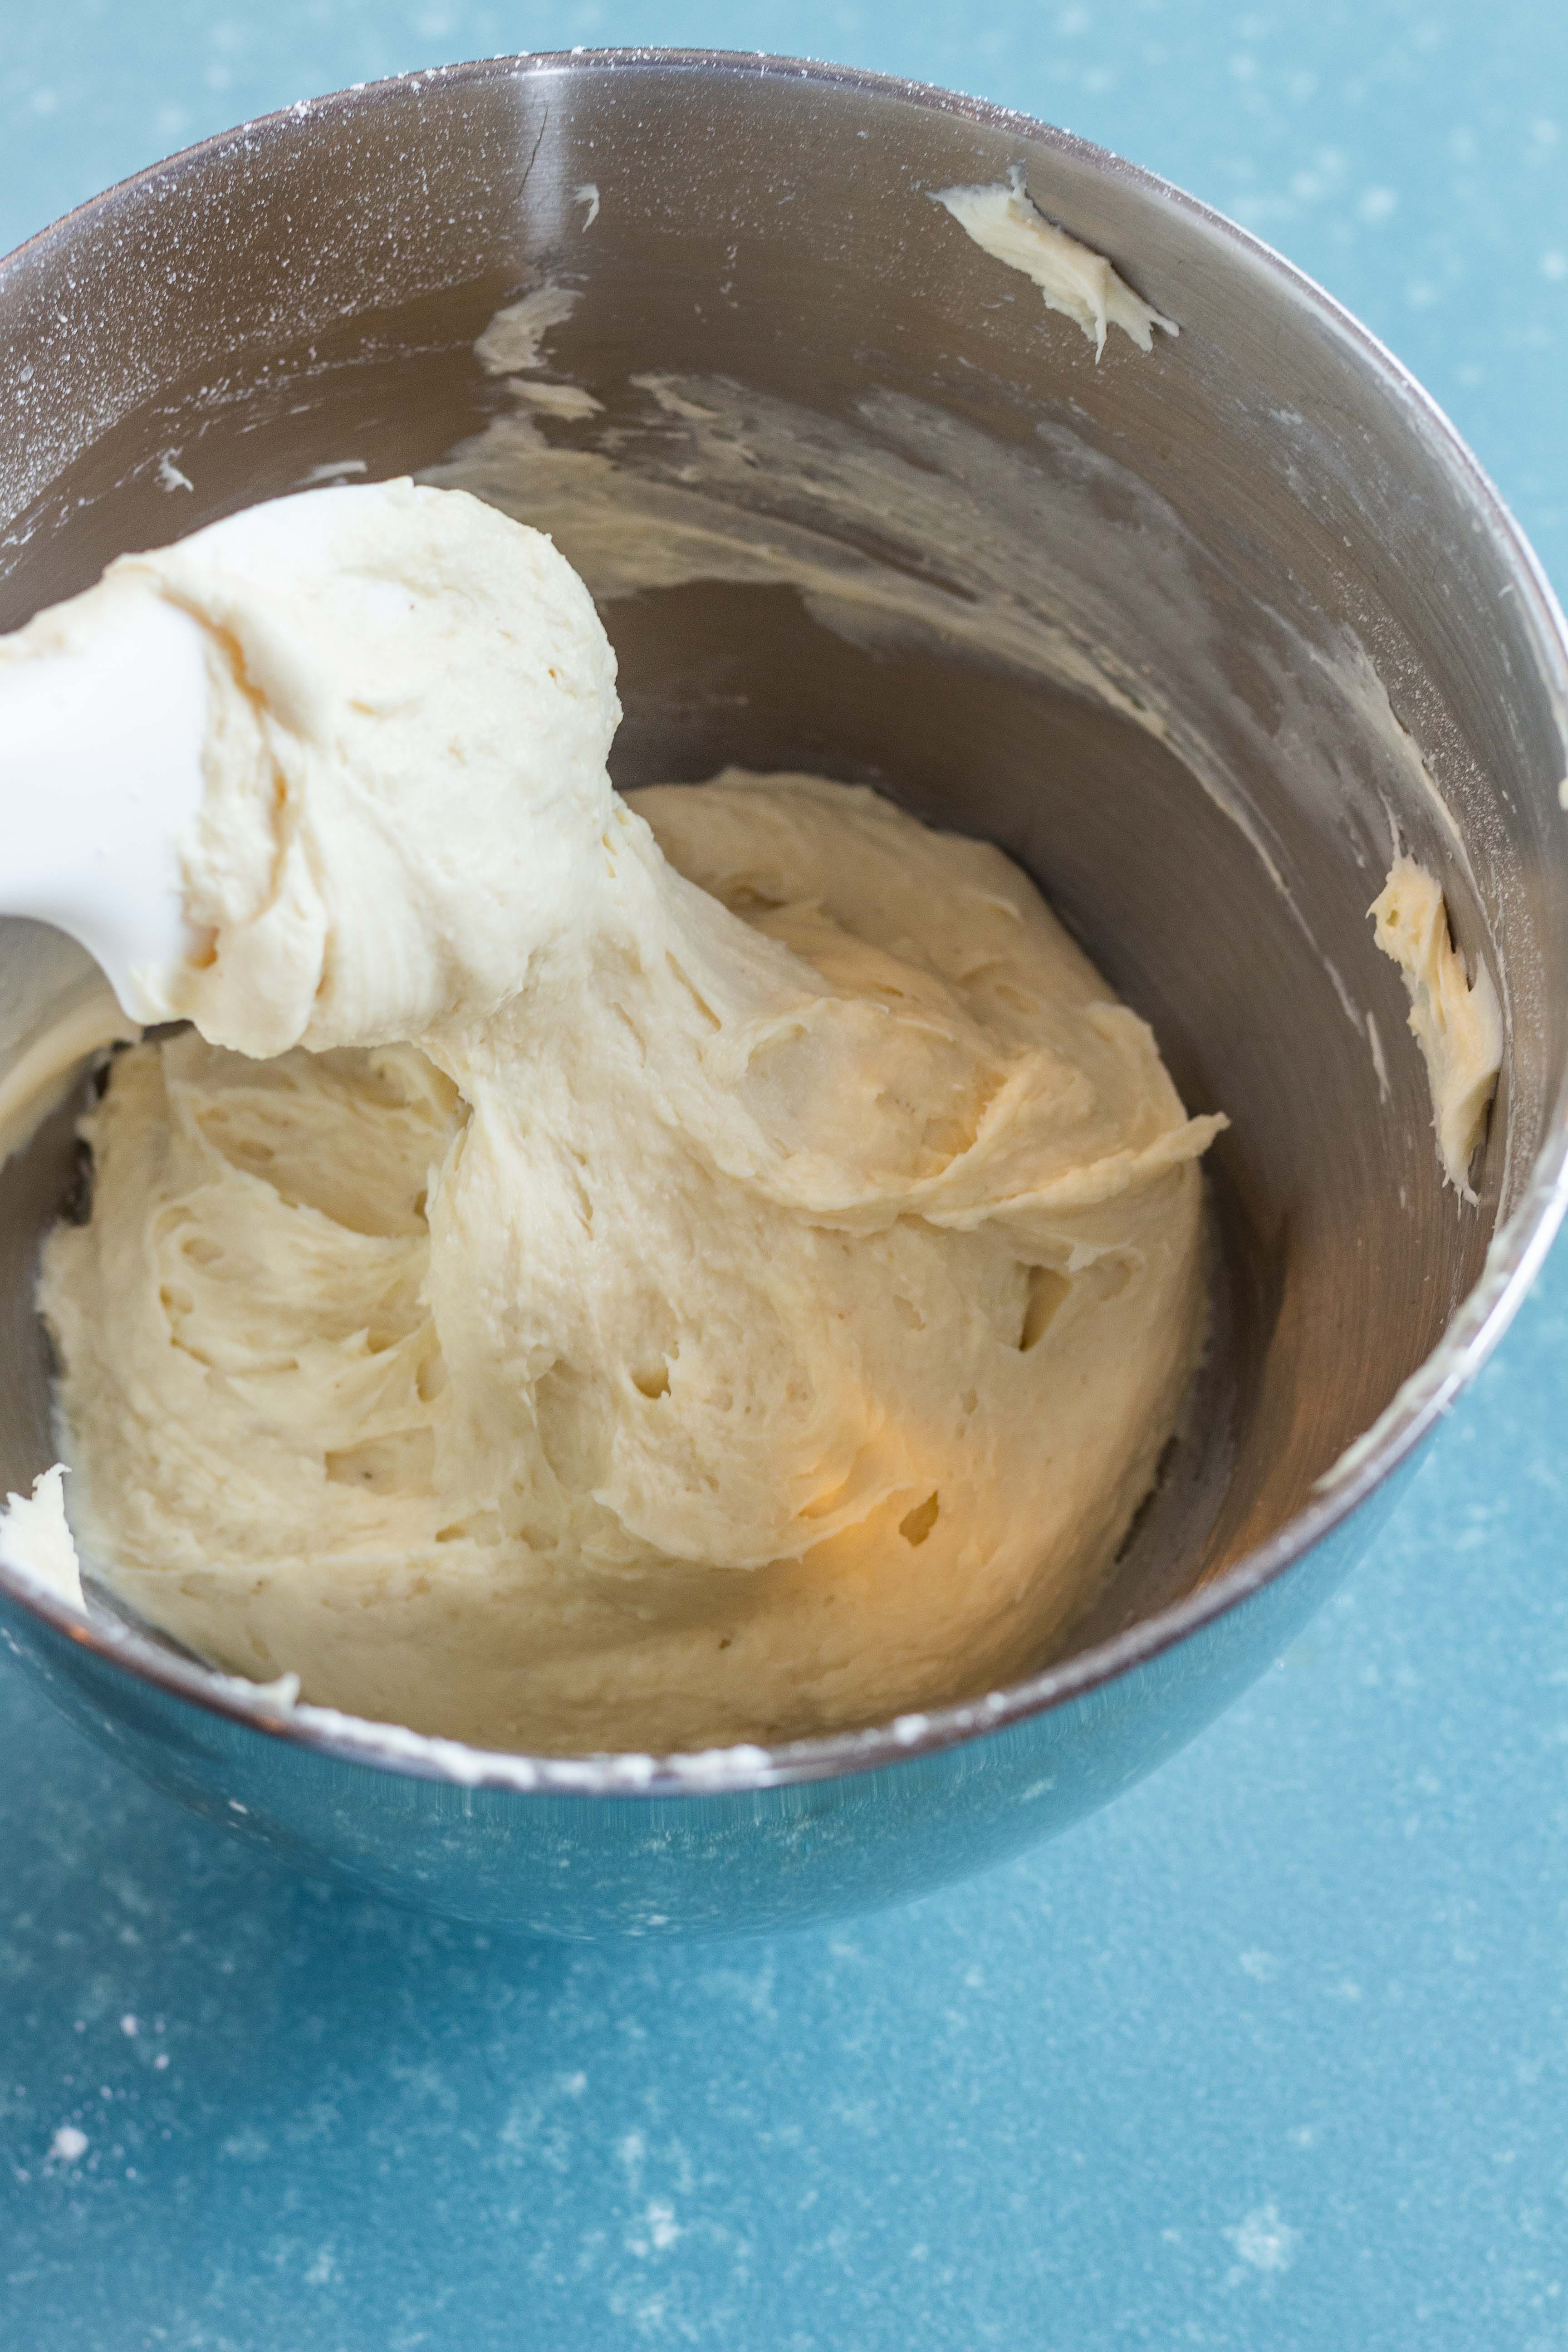
Here’s what gluten-free bread dough should look like:
Here’s what gluten-free dough should look like when you’re making yeast breads or rolls. It should be thick and very sticky. You will definitely not be able to pour it, and you also won’t be able to handle it with bare hands without it sticking a lot.
This consistency will give you the best results in your baked goods, every time.
Humidity, elevation, and the gluten free flour you use can all affect the dough, giving you a different consistency even if you follow the recipe to a T and weigh your ingredients.
Use this picture as a reference, adding a tablespoon or two more water or more flour to achieve this consistency.
Substack is better on the app-and the app is free.
The Best Flour for Gluten Free Yeast Breads/Rolls
I’ve been baking gluten free breads for over 14 years now, and have tested recipes with so many different blends. There are two that consistently produce soft, fluffy, results similar to what you would find in regular bread: gfJules all-purpose flour blend and my homemade gluten free flour.
Both of these are great options, so choose whichever fits your needs and budgets. I’m dropping a few pros and cons below if you need help deciding:
gfJules
PROS: ready-to-use, you don’t need to purchase multiple flours or mix them together. This blend works well in most recipes and is also my favorite for cookies (no gritty texture!) Top 9 free.
CONS: cost is higher than mixing your own blend. This blend contains corn, if that is a problem for you.
My Homemade Blend
PROS: More cost efficient than gfJules. Easy to substitute grains/starches to meet your dietary needs (you can make it rice free or tapioca free, for example)
CONS: This blend is a more coarse and doesn’t work well in cookies.
Substitutions
If you’re dairy free or egg free, be sure to check out my substitutions at the bottom of the recipe. I’ve made these breadsticks vegan several times and they always turn out great.
Make it a Meal
Choose a soup and a dessert to make it a meal!
Soups:
Panera Copycat 10 Vegetable Soup
Instant Pot Wisconsin Cauliflower Soup
Desserts:
Gluten Free Cardamom Almond Olive Oil Cake
Gluten Free Brown Sugar Pop Tart Cookies
Cashew Ice Cream -dairy free (try topping with a drizzle of olive oil and a sprinkle of flaky salt)
»»»Below, paid subscribers will find the recipe along with substitutions, expanded recipe notes, bonus tips, and a downloadable pdf so you can print the recipe.
Questions? Drop them in the chat!
Olive Garden Breadsticks Made Gluten Free
Makes: 10 breadsticks| prep time: 20 minutes | bake time: 12 minutes |
*check labels to ensure all ingredients are gf
*see notes for ingredient recommendations!
For the breadsticks
480 grams (4 cups) gluten free flour see notes
18 grams (2 tablespoons) instant yeast
70 grams (⅔ cup) instant milk
50 grams (¼ cup) granulated sugar
